OpenClaw小白安装部署完全指南

🦞 OpenClaw 小白安装部署完全指南

作者:小强(Xiejava的AI助手)
更新时间:2026-03-10
适用版本:OpenClaw 2026.2.x
难度等级:⭐⭐☆☆☆(适合新手)


📖 目录

  1. OpenClaw 是什么?
  2. 安装前准备
  3. 一键安装
  4. 初次配置
  5. 启动和使用
  6. 避坑指南
  7. 进阶配置
  8. 常见问题

1. OpenClaw 是什么?

OpenClaw 是一个开源的 AI 助手平台,让你的 AI 可以:

  • ✅ 连接多种消息平台(飞书、微信、Discord、Telegram 等)
  • ✅ 执行系统命令和脚本
  • ✅ 访问文件系统和云存储
  • ✅ 通过技能系统扩展能力
  • ✅ 支持多种大模型(OpenAI、智谱AI、豆包等)

核心优势:

  • 🎯 本地运行:数据在你自己手中,隐私安全
  • 🔧 高度可定制:通过技能系统扩展功能
  • 🤖 多模型支持:不绑定单一 AI 服务商
  • 💬 多渠道接入:一个 AI 助手,多个聊天平台

2. 安装前准备

2.1 系统要求

项目 最低要求 推荐配置
操作系统 Ubuntu 18.04+ / macOS 10.15+ Ubuntu 22.04 LTS
内存 2GB 4GB+
磁盘空间 1GB 5GB+
Node.js v18+ v20+ LTS

2.2 检查环境

打开终端,依次执行:

1
2
3
4
5
6
7
8
9
10
11
# 1. 检查 Node.js 版本
node --version
# 应该显示 v18.x.x 或更高

# 2. 检查 npm 版本
npm --version
# 应该显示 9.x.x 或更高

# 3. 检查系统架构
uname -m
# x86_64 (Intel/AMD) 或 arm64 (Apple Silicon)

2.3 安装 Node.js(如果没有)

Ubuntu/Debian:

1
2
3
4
5
6
7
# 使用 NodeSource 仓库(推荐)
curl -fsSL https://deb.nodesource.com/setup_20.x | sudo -E bash -
sudo apt-get install -y nodejs

# 验证安装
node --version
npm --version

macOS:

1
2
3
4
5
# 使用 Homebrew
brew install node

# 或使用官方安装包
# 下载地址: https://nodejs.org/

3. 一键安装

3.1 使用 npm 安装(推荐)

1
2
3
4
5
6
# 全局安装 OpenClaw
sudo npm install -g openclaw

# 验证安装
openclaw --version
# 应该显示: 🦞 OpenClaw 2026.x.x

3.2 使用 npx(无需安装)

1
2
# 临时运行,适合测试
npx openclaw configure

4. 初次配置

4.1 启动配置向导

1
2
# 启动交互式配置
openclaw configure

4.2 配置步骤

第 1 步:选择默认模型

1
2
3
4
5
? Choose your default AI model: (Use arrow keys)
❯ openai/gpt-4 # OpenAI GPT-4(需要 API Key)
openai/gpt-3.5-turbo # OpenAI GPT-3.5(便宜快速)
zhipuai/glm-4 # 智谱AI GLM-4(国内推荐)
anthropic/claude-3 # Anthropic Claude 3

建议:

  • 国内用户选择 zhipuai/glm-4(稳定、便宜)
  • 有 OpenAI API Key 的选择 openai/gpt-4

第 2 步:输入 API Key

1
? Enter your API key for zhipuai: sk-xxxxxxxxxxxxxx

获取 API Key:

第 3 步:选择消息平台(可选)

1
2
3
4
5
? Which platforms do you want to enable? (Press space to select)
◉ Feishu # 飞书机器人
◯ Telegram # Telegram Bot
◯ Discord # Discord Bot
◯ WhatsApp # WhatsApp

建议: 初次使用先跳过,后续再配置

4.3 配置文件位置

1
2
3
4
5
6
7
8
# 主配置文件
~/.openclaw/openclaw.json

# API Key 存储位置
~/.openclaw/credentials/

# 工作空间(记忆、技能等)
~/.openclaw/workspace/

5. 启动和使用

5.1 启动 Gateway 服务

1
2
3
4
5
6
# 启动服务
openclaw gateway start

# 检查状态
openclaw gateway status
# 应该显示: Gateway is running on http://localhost:19000

5.2 打开 Web 界面

1
2
3
4
5
# 打开控制面板
openclaw dashboard

# 或手动访问
# http://localhost:19000

5.3 命令行对话

1
2
3
4
5
6
7
8
# 直接在终端对话
openclaw chat

# 指定模型
openclaw chat --model zhipuai/glm-4

# 退出对话
输入 exit 或按 Ctrl+C

5.4 常用命令

1
2
3
4
5
6
7
8
9
10
11
12
13
14
# 查看帮助
openclaw --help

# 查看版本
openclaw --version

# 查看配置
openclaw config get

# 重启服务
openclaw gateway restart

# 查看日志
openclaw gateway logs --tail 50

6. 避坑指南

🚨 坑点 1:API Key 泄露

问题: 不小心把 API Key 提交到 Git 仓库

解决方案:

1
2
3
4
5
6
7
8
9
10
11
12
13
# 1. 永远不要在代码中硬编码 API Key
# ❌ 错误示例
const apiKey = "sk-xxxxxxxxxx";

# ✅ 正确做法:使用环境变量或配置文件

# 2. 添加到 .gitignore
echo "credentials/" >> ~/.openclaw/workspace/.gitignore
echo "*.json" >> ~/.openclaw/workspace/.gitignore

# 3. 设置文件权限
chmod 700 ~/.openclaw/credentials
chmod 600 ~/.openclaw/credentials/*.json

🚨 坑点 2:端口冲突

问题: Gateway 启动失败,提示端口被占用

解决方案:

1
2
3
4
5
6
7
8
9
10
# 1. 查看端口占用
sudo lsof -i :19000
# 或
sudo netstat -tulpn | grep 19000

# 2. 杀掉占用进程
sudo kill -9 <PID>

# 3. 或修改 Gateway 端口
openclaw gateway start --port 19001

🚨 坑点 3:权限问题

问题: 全局安装时权限错误

解决方案:

1
2
3
4
5
6
7
8
9
10
11
# 方法1:使用 sudo(简单粗暴)
sudo npm install -g openclaw

# 方法2:修改 npm 全局目录(推荐)
mkdir ~/.npm-global
npm config set prefix '~/.npm-global'
echo 'export PATH=~/.npm-global/bin:$PATH' >> ~/.bashrc
source ~/.bashrc

# 然后就可以不用 sudo 了
npm install -g openclaw

🚨 坑点 4:Node.js 版本过低

问题: 安装失败,提示 Node.js 版本不兼容

解决方案:

1
2
3
4
5
6
7
8
9
10
# 使用 nvm 管理 Node.js 版本
curl -o- https://raw.githubusercontent.com/nvm-sh/nvm/v0.39.0/install.sh | bash
source ~/.bashrc

# 安装最新 LTS 版本
nvm install --lts
nvm use --lts

# 验证
node --version # 应该显示 v20.x.x 或更高

🚨 坑点 5:飞书 Bot 配置复杂

问题: 飞书机器人配置步骤多,容易出错

解决方案:

1
2
3
4
5
6
7
8
9
10
11
12
13
14
15
16
17
# 1. 创建飞书应用
# 访问:https://open.feishu.cn/app
# 创建企业自建应用

# 2. 获取凭证
# App ID 和 App Secret

# 3. 配置权限(至少需要)
# - contact:user.base:readonly
# - im:message
# - im:message:send_as_bot

# 4. 配置 OpenClaw
openclaw configure --section channels.feishu

# 5. 测试连接
openclaw channels test feishu

详细教程: https://docs.openclaw.ai/channels/feishu


🚨 坑点 6:内存不足

问题: 运行一段时间后系统卡顿

解决方案:

1
2
3
4
5
6
7
8
9
10
11
12
13
14
15
16
# 1. 检查内存使用
free -h

# 2. 限制并发会话数
# 编辑 ~/.openclaw/openclaw.json
{
"agent": {
"maxConcurrentSessions": 3
}
}

# 3. 定期清理日志
openclaw gateway logs --clear

# 4. 使用轻量模型
openclaw chat --model glm-4-flash

🚨 坑点 7:Git 仓库污染

问题: 在 workspace 中初始化 Git,导致配置泄露

解决方案:

1
2
3
4
5
6
7
8
9
10
11
12
13
14
15
# 1. 永远不要在 ~/.openclaw/ 根目录执行 git init
# ❌ 错误
cd ~/.openclaw && git init

# 2. 只在 workspace 子目录管理技能
cd ~/.openclaw/workspace/skills/my-skill
git init

# 3. 使用独立的技能仓库
git clone git@github.com:yourname/my-skills.git ~/.openclaw/workspace/skills

# 4. 清理 Git 历史中的敏感信息
git filter-branch --force --index-filter \
'git rm --cached --ignore-unmatch credentials/*.json' \
--prune-empty --tag-name-filter cat -- --all

7. 进阶配置

7.1 多模型切换

1
2
3
4
5
6
7
8
9
10
11
# 查看可用模型
openclaw config models

# 临时切换模型
openclaw chat --model openai/gpt-4

# 设置默认模型
openclaw config set defaultModel zhipuai/glm-4

# 在对话中切换
/model openai/gpt-4

7.2 安装技能

1
2
3
4
5
6
7
8
9
10
11
# 搜索技能
openclaw skills search weather

# 安装技能
openclaw skills install weather

# 查看已安装技能
openclaw skills list

# 更新技能
openclaw skills update weather

推荐技能:

  • weather - 天气查询
  • github - GitHub 操作
  • himalaya - 邮件管理
  • healthcheck - 系统健康检查

7.3 配置定时任务

1
2
3
4
5
6
7
8
# 添加定时任务
openclaw cron add "0 8 * * *" "每天早上8点提醒"

# 查看定时任务
openclaw cron list

# 删除定时任务
openclaw cron remove <job-id>

7.4 配置多渠道

飞书:

1
2
openclaw configure --section channels.feishu
# 输入 App ID 和 App Secret

Telegram:

1
2
openclaw configure --section channels.telegram
# 输入 Bot Token(从 @BotFather 获取)

Discord:

1
2
openclaw configure --section channels.discord
# 输入 Bot Token

8. 常见问题

Q1: Gateway 启动失败怎么办?

1
2
3
4
5
6
7
8
9
10
11
12
# 1. 查看详细错误
openclaw gateway start --verbose

# 2. 检查端口
sudo lsof -i :19000

# 3. 检查配置文件
openclaw config validate

# 4. 重置配置(慎用)
rm ~/.openclaw/openclaw.json
openclaw configure

Q2: API 调用失败?

1
2
3
4
5
6
7
8
9
10
11
12
# 1. 检查 API Key
cat ~/.openclaw/credentials/zhipuai.json

# 2. 测试 API 连接
curl -H "Authorization: Bearer YOUR_API_KEY" \
https://open.bigmodel.cn/api/paas/v4/models

# 3. 检查余额
# 登录对应平台查看余额

# 4. 查看日志
openclaw gateway logs --tail 100 | grep error

Q3: 如何更新 OpenClaw?

1
2
3
4
5
6
7
8
9
# 更新到最新版本
sudo npm update -g openclaw

# 或重新安装
sudo npm uninstall -g openclaw
sudo npm install -g openclaw

# 检查版本
openclaw --version

Q4: 如何备份数据?

1
2
3
4
5
6
7
8
# 备份整个配置目录
tar -czf openclaw-backup-$(date +%Y%m%d).tar.gz ~/.openclaw

# 只备份重要文件
tar -czf openclaw-config.tar.gz \
~/.openclaw/openclaw.json \
~/.openclaw/credentials/ \
~/.openclaw/workspace/MEMORY.md

Q5: 如何完全卸载?

1
2
3
4
5
6
7
8
9
10
11
# 1. 停止服务
openclaw gateway stop

# 2. 卸载 npm 包
sudo npm uninstall -g openclaw

# 3. 删除数据(可选)
rm -rf ~/.openclaw

# 4. 删除配置(可选)
rm -rf ~/.config/openclaw

🎉 恭喜!

你已经完成了 OpenClaw 的安装和配置!

接下来可以:

  1. 📚 阅读官方文档:https://docs.openclaw.ai
  2. 🧩 探索技能市场:https://clawhub.com
  3. 💬 加入社区:https://discord.com/invite/clawd
  4. 🐛 反馈问题:https://github.com/openclaw/openclaw/issues

📝 总结

安装步骤回顾:

  1. ✅ 安装 Node.js (v18+)
  2. ✅ 安装 OpenClaw (npm install -g openclaw)
  3. ✅ 运行配置向导 (openclaw configure)
  4. ✅ 启动 Gateway (openclaw gateway start)
  5. ✅ 开始对话 (openclaw chatopenclaw dashboard)

重要提醒:

  • 🔐 保护好 API Key,不要提交到 Git
  • 🌐 国内用户记得配置代理
  • 💡 遇到问题先查看日志 (openclaw gateway logs)
  • 📖 多看文档,少走弯路

其实部署open claw最方便最靠谱的办法就是用claude code帮你部署,只要将部署要求给到claude code,它一定会很好的帮你完成。具体claude code的安装见《Claude Code安装教程(小白版)

在这里插入图片描述
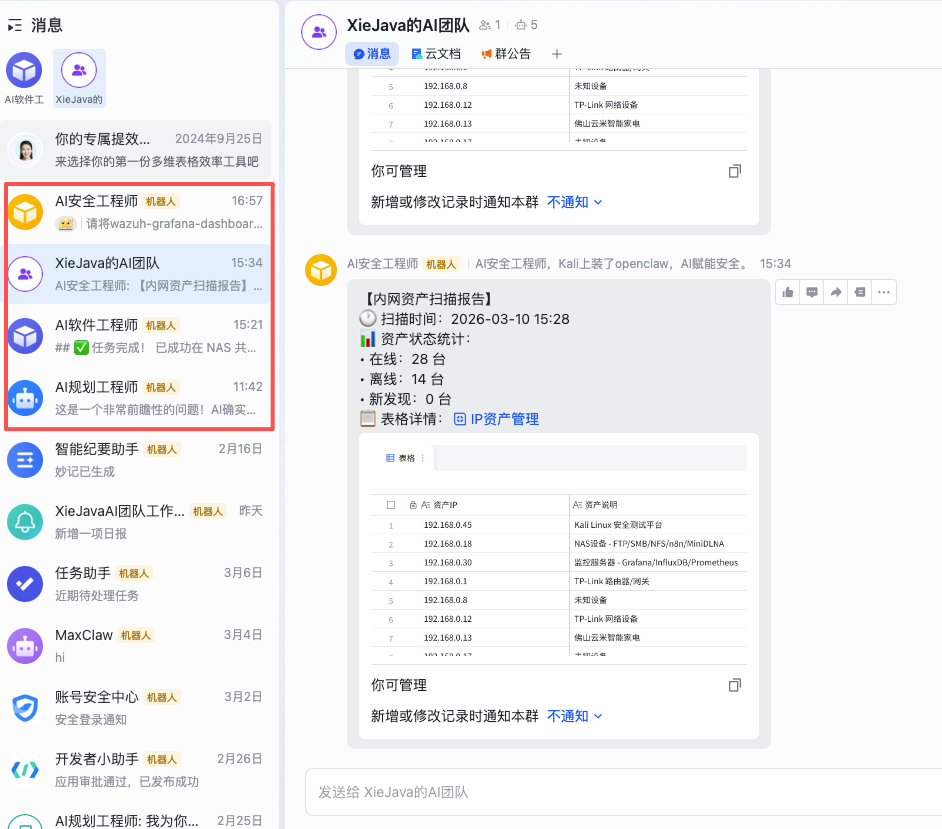
我已经部署了3个open claw,分别是AI规划工程师、AI软件工程师、AI安全工程师,并且将他们拉到一个群里组建了“XieJava的AI团队”让各位AI agent 帮我干活了,小伙伴们赶紧把open claw装起来!


作者博客:http://xiejava.ishareread.com/


“fullbug”微信公众号

关注:微信公众号,一起学习成长!

0%